Welcome to today’s guide on how to download Nokia 3.1 Plus TA-1124 Firmware Flash File and how to install the stock ROM on your phone.
This file can help you reset your phone for bootloop, password reset, hanging, and fix many other problems.
This file is strictly for only the Nokia 3.1 Plus TA-1124.
Downloads:
- Nokia_3.1_Plus_TA-1124_RHD-126N-0-00N0-B01_OST.zip
- Nokia_3.1_Plus_TA-1124_RHD-126H-0-00N0-B03.zip
- Nokia_3.1_Plus_TA-1124_RHD-126E-0-00N0-B01_OST.zip
Flashing requirements
- A laptop, desktop, or PC
- The OST Tool
- A working USB cord
Flashing Nokia 3.1 Plus TA-1124 with OST Tool
Let’s take it one after the other so that we don’t experience any problems in the process.
- Go to where the firmware file is downloaded on your laptop or desktop and create a folder, naming it “flashing my phone”. This is absolutely optional; we are doing this to help us not get anything mixed up.
- Copy or move the downloaded firmware to the folder you created. After doing this, extract the firmware to get the .mlf or .nb0 file.
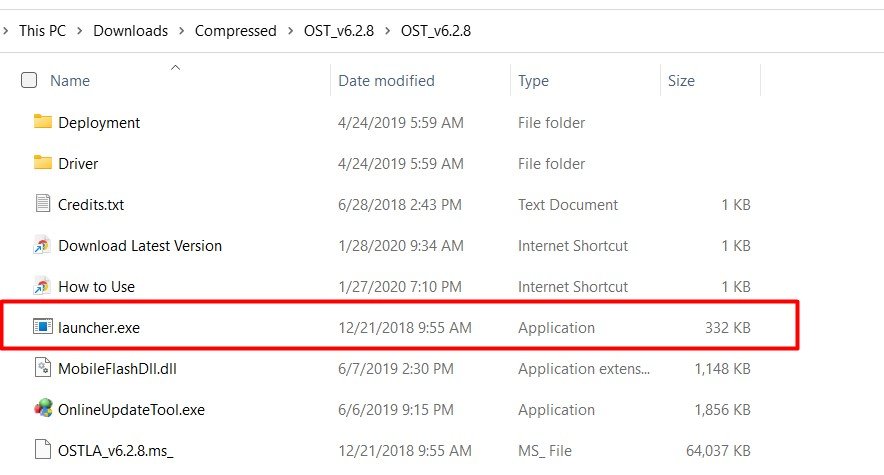
- Download the OST Tool to your PC, locate the file where you downloaded it, and when you do that, extract the contents of the downloaded file to get the files below.
- Double-click or launch the (launcher.exe) to begin the installation of the tool.
- Complete the OST LA installation process.
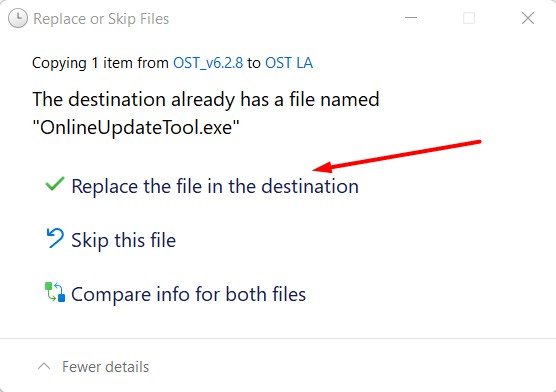
- When the installation is complete, close the installer and locate the ‘OnlineUpdateTool.exe‘ in the same folder where you saw ‘launcher.exe‘. Copy the ‘OnlineUpdateTool.exe‘, and then locate this folder ‘This PC\ C:\Program Files (x86)\OST LA‘ on your PC and paste the copied file there. If any warning pops up asking you whether you want to replace a file that already exists there with the same name, click yes to replace the file with the one you copied. Once you do this, go to the next step.
- While still in the ‘C:\Program Files (x86)\OST LA‘ folder, you can find a file called ‘OST LA‘ and launch it or go to your PC start menu and look for a file with the label ‘OST LA‘, and launch the software from there. Once it is opened, click on ‘Next’ to proceed to the next process.

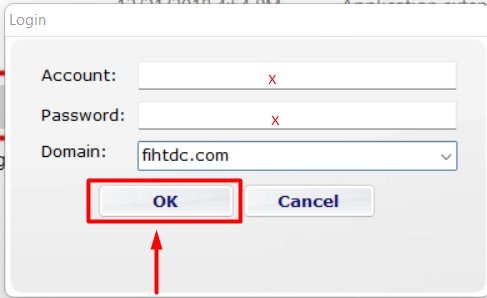
- When the login appears, do not enter any username or password; just click OK to proceed to the flashing.
- Click the horizontal 3 dots (…) on the software to locate the firmware you moved to the folder you created. Once you have located the firmware, select the .mlf or .nb0 file and click open to load it into the software.

- Once the file is loaded in the software, an option will appear below, and you will have to click it and select the flashing process that suits your needs.
- You can choose ‘Normal Download‘; this option installs the firmware without wiping your Nokia 3.1 Plus TA-1124 (it may bring incompatibilities or other problems). But you can also select the ‘Emergency Download” which can help you to revive your dead device but also wipes everything on the device, giving you a clean smartphone that is as good as new (software part though).
- There are other features that you can tick from the options if you require any of those (let us skip what we don’t need).
- Power off the smartphone and boot it to ‘Download Mode’, only when it is in this mode will the smartphone be able to actively interact with the PC.
- To boot your phone to ‘Download Mode’, press and hold the volume down and power buttons together while off, and keep holding it till it goes to ‘Download Mode’.
- Now plug in your smartphone to the PC with a working USB and ensure it makes a connection sound or shows that it is really connected to the PC (I will advise that you keep your smartphone on a stable surface to avoid shaking the device and bricking your device forever).
- Click ‘Next’ to proceed with the flashing of the ROM to your smartphone.
- The flashing will begin, and we have to wait and not play with the phone or PC while that is happening.
- You will get a success message at the end that the process is successful. Feel free to tell us in the comment section if it does not work.
- You can now close the software, disconnect your smartphone from the PC, and reboot it.
- The first booting usually takes a couple of minutes, so do not panic.
Now enjoy your newly flashed smartphone.